Identifying ghosts in Demonology can often feel like a guessing game if you don't utilize all the equipment at your disposal. To ensure you're making informed decisions rather than mere guesses, dive into our comprehensive **Demonology equipment guide** below.
How to Buy and Use Equipment in Demonology
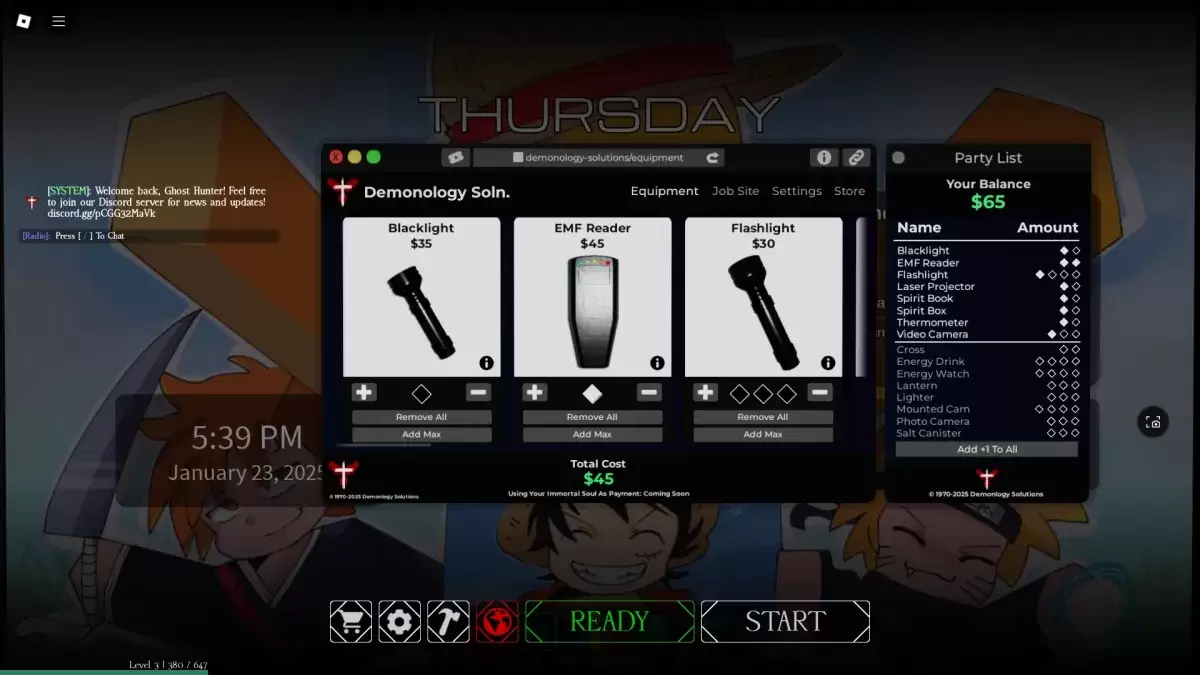
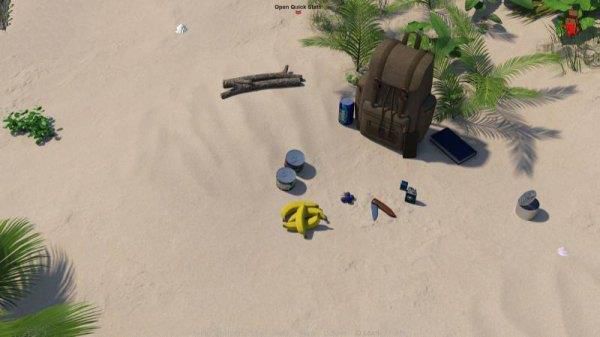
Before embarking on a Demonology run, you have the option to **purchase additional equipment** for your session. Keep in mind that **purchased items** are **available only for the next run**, so it's crucial to spend your in-game currency wisely. Additionally, certain items may also appear within the investigation areas. You're allowed to carry up to three items simultaneously. To utilize a piece of equipment, simply press the **RMB (M2)** button, and to drop it, press the **G** key.
Evidence Equipment in Demonology
The use of evidence equipment is **vital for identifying** **ghosts** in Demonology. These tools are primarily employed to **gather the evidence** necessary to determine the type of ghost you're confronting. For a deeper understanding, refer to our guide on how to identify ghosts in Demonology. Furthermore, evidence equipment can serve as a means to **entice ghosts to manifest**, offering an opportunity to capture their images.
| Item | Use | Party limit | Price |
|---|---|---|---|
| **Blacklight** | • Use the Blacklight to search for fingerprints, handprints, or footprints left by ghosts. | 2 | $35 |
| **EMF Reader** | • The EMF Reader detects ghostly presence. It lights up and emits a sound when activity is detected. Drop it to use as a perimeter scanner. | 2 | $45 |
| **Laser Projector** | • Place the Laser Projector to emit beams that highlight any ghosts moving nearby. | 2 | $65 |
| **Spirit Book** | • Leave the Spirit Book on the ground for ghosts to pick up and write in, providing evidence. | 2 | $40 |
| **Spirit Box** | • Use the Spirit Box for dialogue options to communicate with nearby ghosts, though they may choose to ignore you. | 2 | $50 |
| **Thermometer** | • The Thermometer shows the current temperature. A deviation from the normal range of 15-19 degrees may indicate a ghost's presence. | 2 | $30 |
| **Video Camera** | • The Video Camera allows you to see ghost orbs in camera view. Drop it to monitor from the PC at the spawn point. | 3 | $50 |
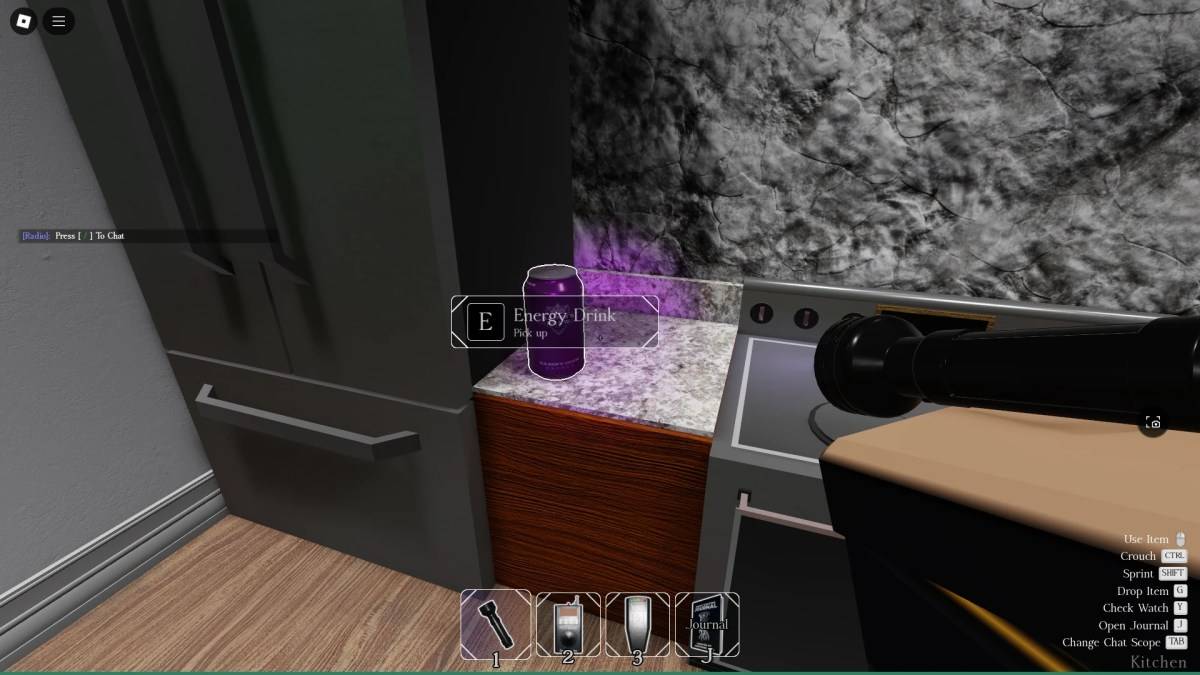
Optional Equipment in Demonology
Optional equipment in Demonology enhances your survival and helps in accomplishing secondary mission objectives. Like all equipment, there's a limit to how many you can bring into a run as a party.
| Item | Use | Party limit | Price |
|---|---|---|---|
| Flashlight | • The Flashlight illuminates a cone in front of you. | 4 | $30 |
| Cross | • Use the Cross to repel a ghost during a hunt. | 2 | $30 |
| Energy Drink | • The Energy Drink replenishes some of your energy. | 4 | $30 |
| Energy Watch | • The Energy Watch displays your remaining energy. | 4 | $50 |
| Lantern | • Holding the Lantern prevents passive energy drain. | 3 | $15 |
| Lighter | • The Lighter serves as a light source and can ignite the Lantern and candles. | 3 | $10 |
| Mounted Cam | • Similar to the Video Camera, the Mounted Cam allows monitoring from the PC at spawn while freeing up your hands for other equipment. | 4 | $50 |
| Photo Camera | • The Photo Camera captures images of ghosts and other elements, aiding in completing optional objectives. | 3 | $40 |
| Salt Canister | • Salt Canisters can deter certain ghosts and help secure handprint evidence. | 3 | $15 |
**This concludes our guide on equipment in Demonology. For more Roblox guides, explore the Roblox guides section on Escapist.**